
Dear Adventure Avenue,
It’s no secret that I LOVE Star Wars, so when I saw this Star Wars wallpaper, I knew I had to get some. It was perfect to spruce up my plain white dresser! Now I had never worked with peel and stick wallpaper before (or any wallpaper for that manner- unless peeling it off my wall as a child counts;)), but I found it was super easy to work with.
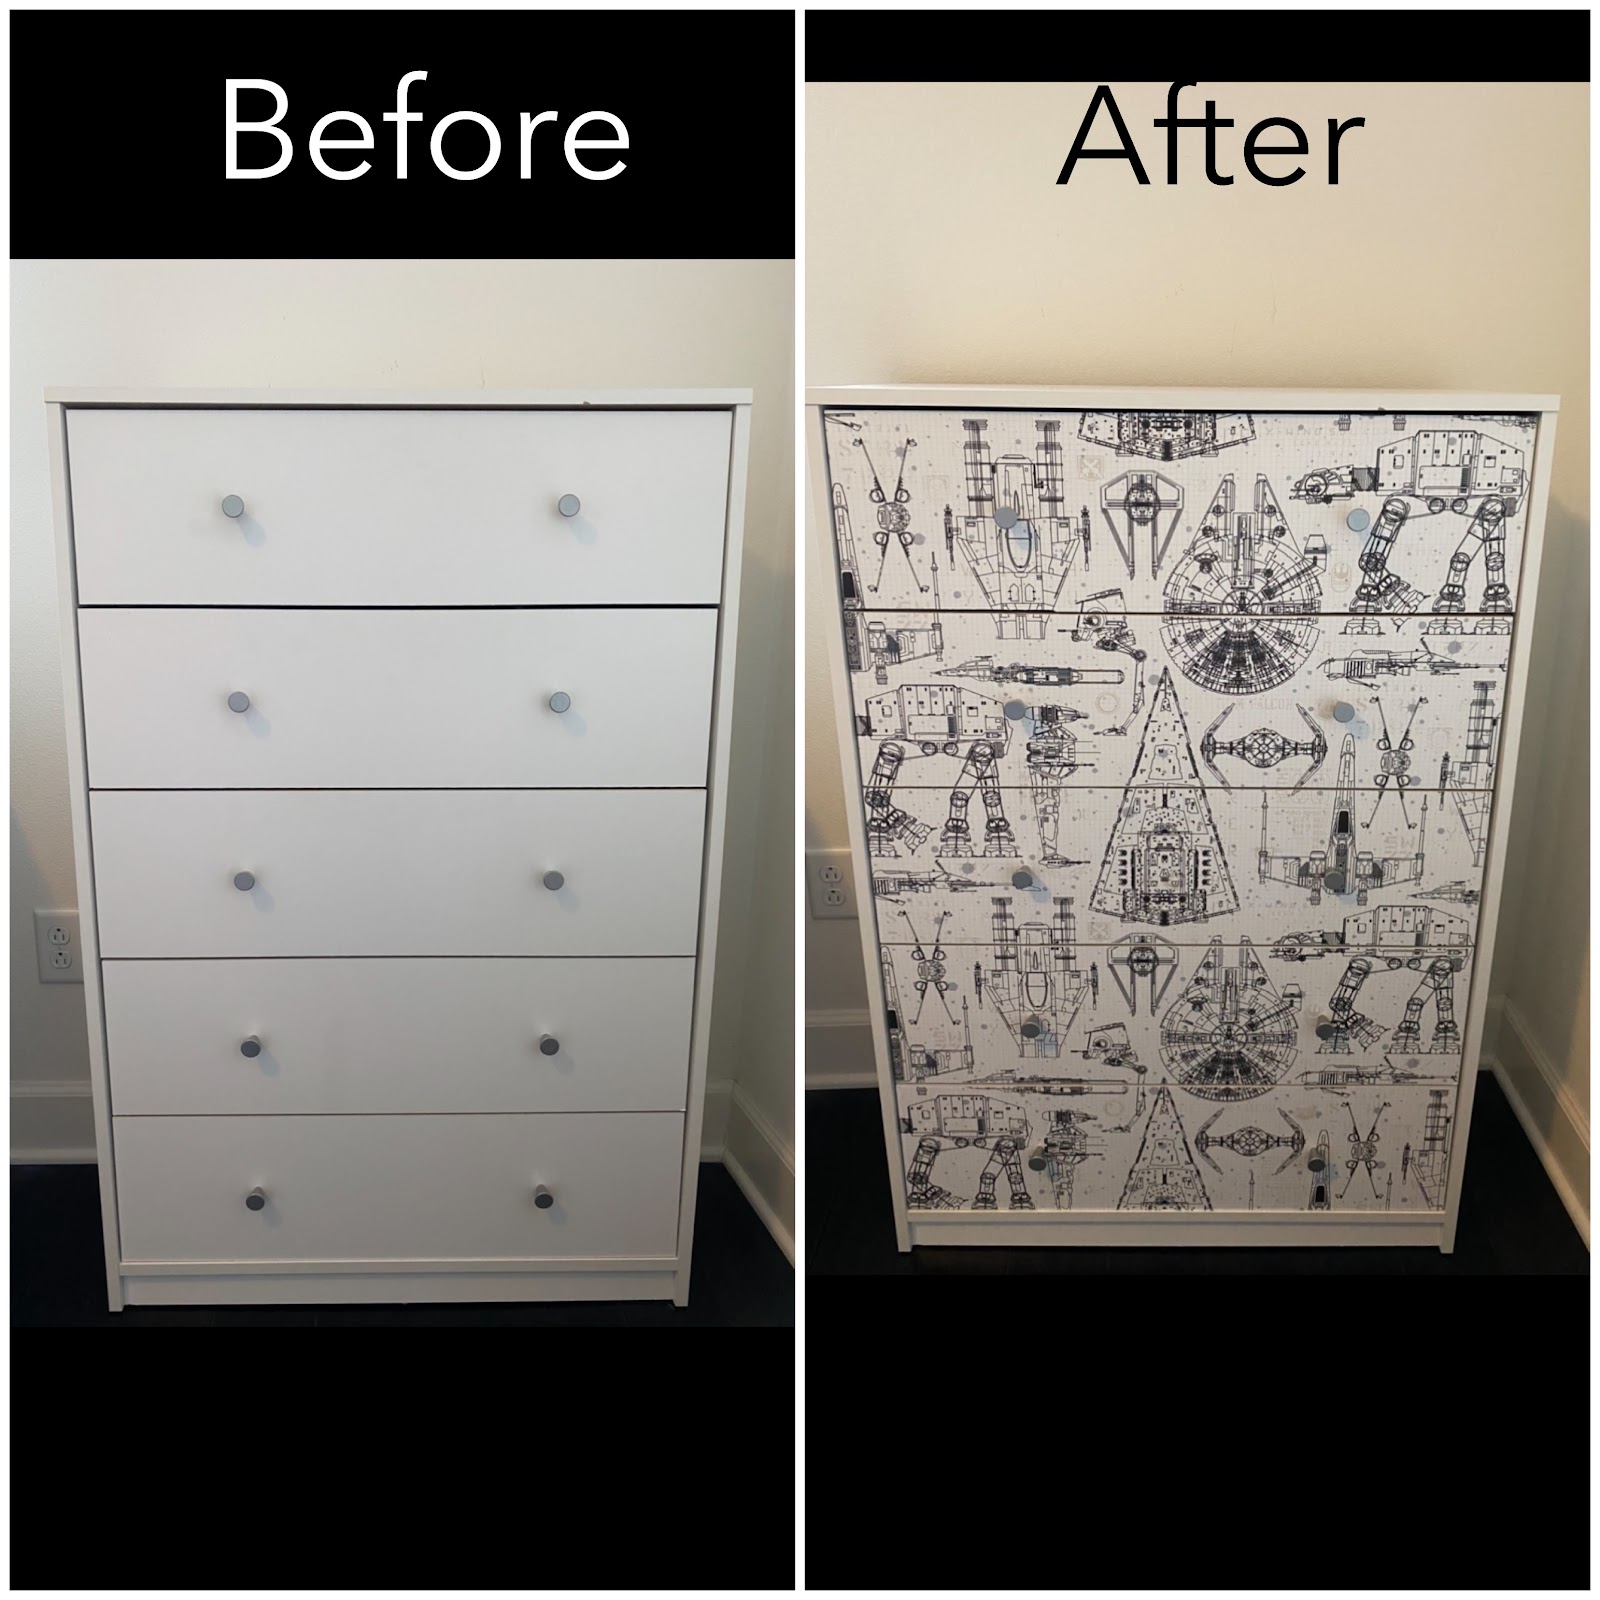
Well enough of my chattering, let me tell you how you can transform your dresser (or side table or desk or whatever you want) into a lovely Star Wars accent piece!
What you will need:
- Wallpaper (for my 46 inch by 28 inch dresser I only used about half of one roll)
- Dresser that has flat drawers (This is important because if your drawers have an indented outline, it’s going to be hard to put the wallpaper on and have it still look nice and clean)
- Scissors
- X-acto knife (not necessary but extremely helpful!)
- Measuring tape
- Wallpaper smoothing tool or a book
- Screwdriver (depending on if your dresser has knobs)
Steps:
- Remove your drawers if you can. This will make it a lot easier to stick the wallpaper. (Although it is still possible to do it if your drawers don’t come out).

- Unscrew the dresser knobs.
- Wipe down your drawers so that the surface is clean.

- Measure the dresser drawers to figure out how much wallpaper you will need to cut for each drawer.

For my dresser, I knew I would have to cut two pieces (and make sure they would line up because my drawers are longer than the wallpaper).

- Start cutting your wallpaper. Cut starting with the top drawer and moving your way down.

If you have to cut 2 or more panels per drawer, then wait until you finish all of one vertical section before moving to the next vertical section. It will make it easier to match up the print.
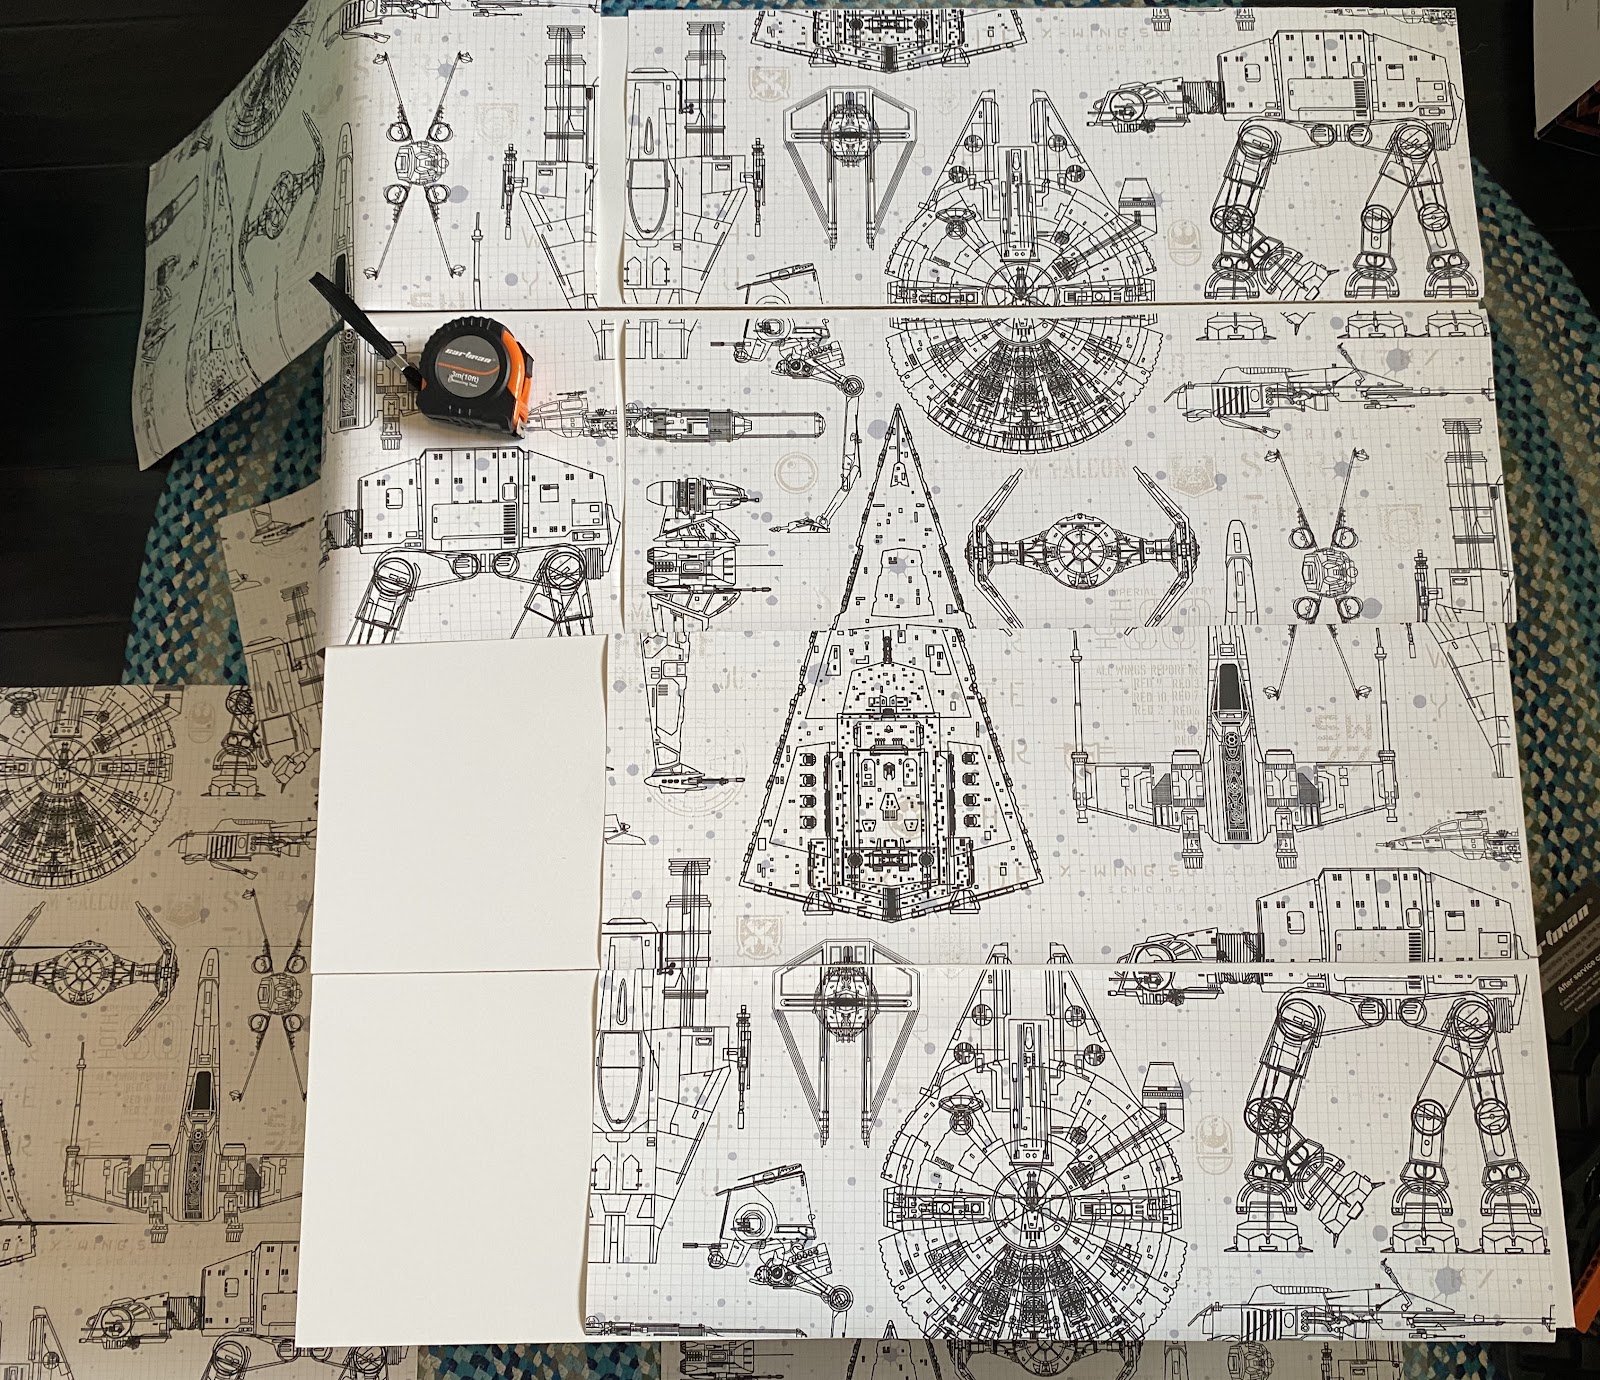
It’s okay if you cut it a little bigger than the actual drawer because it is better to have too much than too little. You can always trim later!
- Once you have all your panels cut, you can start sticking them onto your drawers.
The best way I found was to peel the paper just a little bit and line it up along the edge of the drawer. Then I took my Star Wars Ahsoka” target=”_blank” rel=”noreferrer noopener”>Ahsoka book and used it to help guide the paper and limit air bubbles. As I moved the book I peeled the backing of the wallpaper off.


- If you have to use more than one panel: Line up the pattern and peel the paper just a little bit and line it up along the edge of the drawer. Then I take your book and use it to help guide the paper and limit air bubbles. As I moved the book I peeled the backing of the wallpaper off.
- Repeat steps 6 and 7 with all your drawers, taking care to line each drawer up so the pattern will match.
- After all the wallpaper is on the drawer, use your book or wallpaper smoothing tool to smooth out any air bubbles. Then if you need to, trim off the excess wallpaper
After the air bubbles are out, it’s time to put the knobs back on.
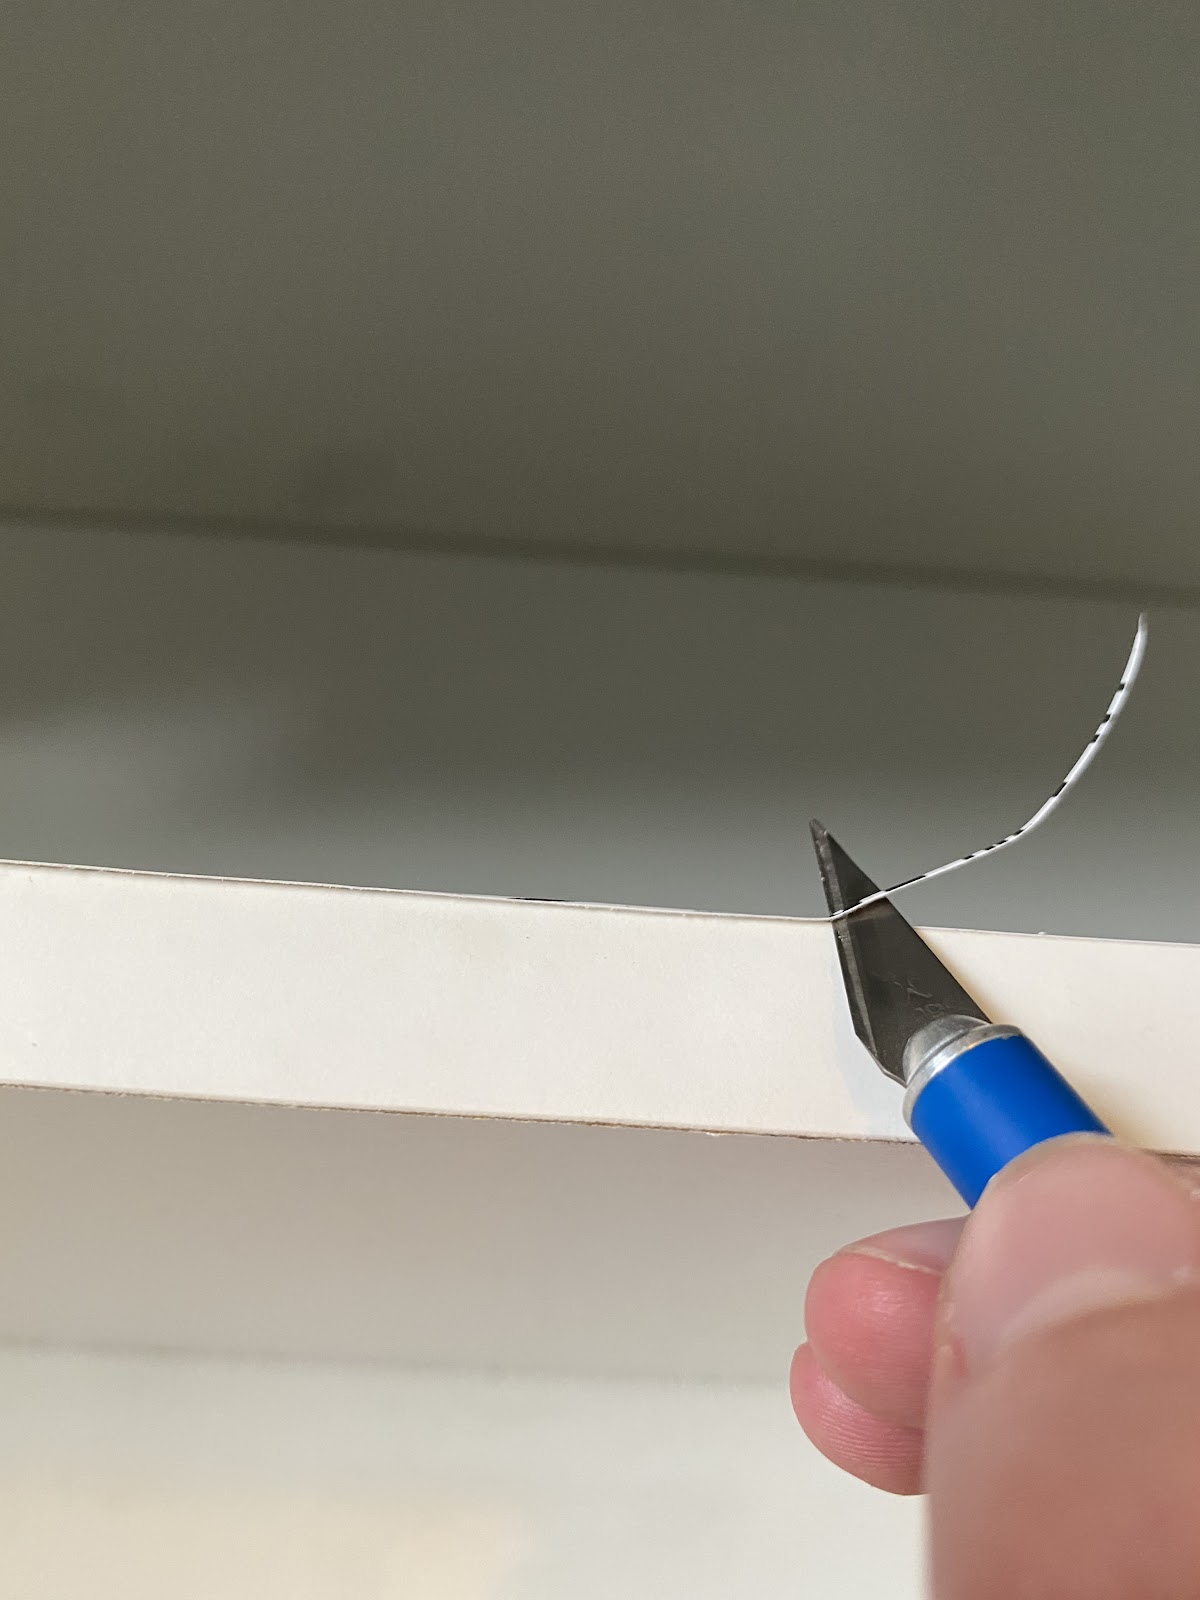
- Take your scissors or X-acto knife and poke a tiny hole or bump from the underside of the drawer (not the wallpaper side). Then from the wallpaper side, clear the hole with your exacto knife. Screw your knob into place.
You can see my little scissors poking up.

11. Place your drawers back into your dresser.
Note: At the bottom of the post I have listed the books on my dresser if you’re interested!

Congratulations! You now have a lovely Star Wars accent piece in your room!
Keep Crafting,
A
In case you’re interested the Star Wars books I have on my dresser are:
– The Aftermath Trilogy by Chuck Wendig:
– Bloodline (Star Wars)” target=”_blank” rel=”noreferrer noopener”>Star Wars: Bloodline by Claudia Gray
– Star Wars Queen’s Shadow” target=”_blank” rel=”noreferrer noopener”>Queen’s Shadow by E.K. Johnston
– Star Wars Ahsoka” target=”_blank” rel=”noreferrer noopener”>Ahsoka by E. K. Johnston
Please note that this post contains amazon affiliate links. This means that if you use the link, I get a small percentage of the sale at no additional cost to you. These links help support my blog. You can check out my privacy policy to find out more. Thanks!
Beautiful!! I want to do mine but I’m scared that it can peel off, do you add anything to firm the sides? Tape? Or fold it inside? Thank you!
Thank you! I did a combination of folding it around the sides and using my X-acto knife to make sure there was no wallpaper sticking out. I didn’t want any to hang over the edges, get caught on something, and then pull off. In both places, the wallpaper is still sticking, and it’s been about a year and a half now. I didn’t use any tape because the wallpaper is pretty sticky.
It’s also important to ensure that when you first put the paper on, you smooth out all the air bubbles because the air bubbles will weaken the wallpaper’s stickiness.
I hope that helps – Let me know if you have any other questions!
Getting ready to paper a dresser this weekend. It’s going to be a gift for my nephews son that’s due any day now. I’ll post pictures. Thanks for sharing your idea.